DIY Paint-Dipped Hamper Refresh
Hi! I'm here to tease you with the tiniest of sneak peeks of our Master Bathroom makeover. I have just a tiny little bit of work to do before I can finally say it is complete. Fingers crossed that by the end of the week I will be sharing the full reveal of the makeover!!
This is one of those little touches that goes a long way to make your space feel new and refreshed, and of course it involves spray paint. (There are a large percentage of my little refresh updates that involve spray paint, it's just too easy!)
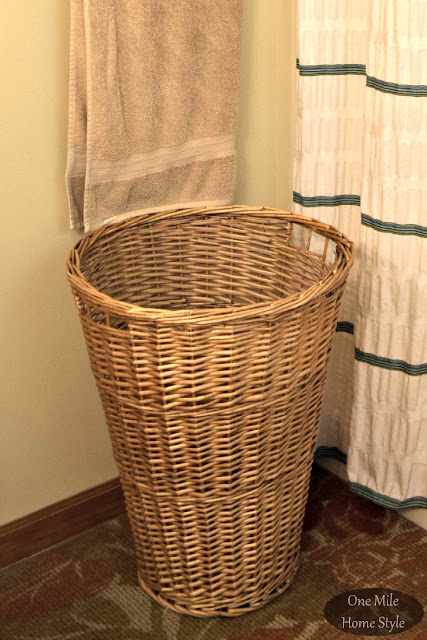
Here is my very basic, and plain wicker hamper before its makeover:
The hamper itself was in great shape, so there was no reason to run out and buy something new for the room makeover. I wanted to add a little more personality and brighten it up a bit too. Enter the painters tape and a can of white spray paint.
As you can see, there were pretty well defined sections which made this pretty easy. I just taped off above the section I wanted to paint, and covered the rest of the hamper with newspaper to avoid any overspray issues.
And, perfection!! The white paint totally brightened up this hamper and the paint-dipped look makes it a great accent piece in this space too. And since I had everything I needed on hand, this "new" hamper was a very budget friendly, FREE update.
I'm so happy with how this paint-dipped laundry hamper turned out! It really is the small little details that make a room shine, and can take a space from good to great!


The paint really brought your wicker hamper up to date. It looks great! I'm thinking I need to try that on my ugly wicker bathroom trashcan. There may be hope for it yet. Thanks!
ReplyDeleteI love this! What a great idea! Thank you so much for sharing at The Creative Circle Link Party : )
ReplyDeleteFun! I need a new hamper, love this idea!
ReplyDelete