Rustic Modern Master Bathroom Makeover: Part 2
Remember all of that talk about big projects over the summer? And the hints and sneak peeks I shared on Instagram? Well today is the day I am finally sharing the reveal of the second part of our master bathroom makeover! Way back at the beginning of July, I shared that the floor of our shower insert had cracked, which in turn drastically moved up our reno timeline for part 2 of this bathroom makeover.
Usually we are up for a good DIY project, we had already done a quick $100 makeover, but this was an instance that we decided to spend a little extra and have a professional do the work. We saved some money by doing the demo work ourselves, and I'm so glad that's where the DIY stopped with this project!
This post may contain affiliate links for your convenience, you can see my full disclosure here.
We discovered that the shower cracked due to the fact that there was no additional framing or support between the subfloor and the floor of the shower, just a nice little 3-4 inch gap between the two. The tile floor has been an issue since we moved in, and now we know exactly why the grout is breaking apart and the tiles are coming loose. The concrete board was not correctly attached to the subfloor, which has allowed it to flex and crack the grout. Perfect examples of just because a house is new, doesn't mean it won't come with headaches surprises.
But, there was a light at the end of the tunnel, and after just a few days, I finally had a new bathroom that turned out better than I could have hoped! And it meant that we didn't have to share a bathroom with the kids anymore!
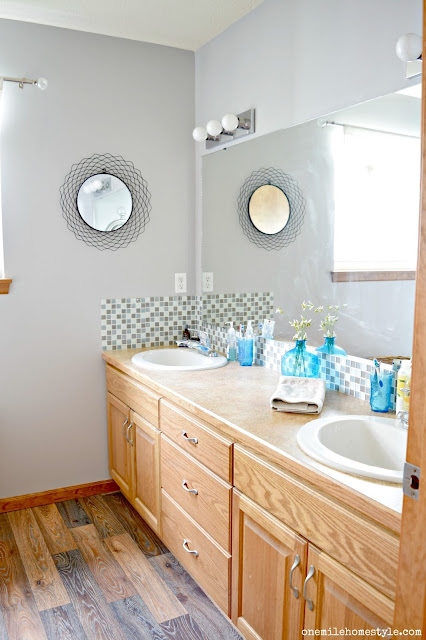
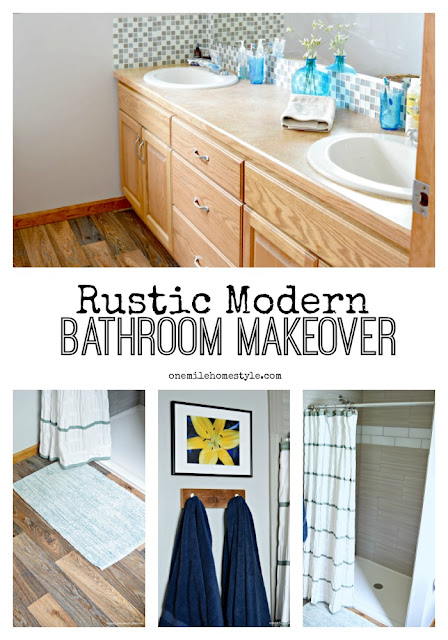
Since I couldn't be convinced to do tile on the floor again, and I really like the look of wood floors, we found an awesome compromise. I am so loving this vinyl flooring we picked, yes, it's a vinyl floor! It has a great texture to it, and the mix of wood tones was perfect since we have stained wood trim, and since it's in a bathroom, the fact that it's waterproof was a no-brainer.
We wanted a tile that wasn't too trendy, but wasn't plain and boring either (and honestly, if you have been reading this blog for any length of time, you know the color I was looking for was most likely grey!). We found this beautiful grey 12x24 porcelain tile and accented it with 4x12 white glass tiles. They pair together so nicely and the white tiles keep it from feeling too dark or heavy.
The splurge in this space was the Onyx Collection shower base. It's not cheap, but with a lifetime warranty, it made it an easy choice compared to any of the other bases that are available. If you are updating your shower, I highly recommend looking into this option, it's definitely been worth the money in my opinion.
I honestly feel like I'm stepping into a nice hotel shower each time I use our new shower. After having a builder-grade everything for so long, it's finally nice to do some upgrades, even if they were unplanned. I'm also so happy that we opted to not DIY this one, or I would probably still be tiling instead of sharing the finished room with you all!
Thinking of giving your bathroom a makeover? Save this pin as inspiration for your own home!


Love love love this! You did a fabulous job!
ReplyDeleteThanks Erica! I love it too!
DeleteYour bathroom turned out wonderfully! Thanks for sharing at The Creative Circle.
ReplyDeleteThanks so much!
DeleteWe did vinyl wood plank floors upstairs, too, and I LOVE them!!! Our bathroom will be next.
ReplyDeleteVinyl flooring is such a great option, I love how it turned out!
DeleteWow, what a great remodel! I love how it turned out, I've been wanting to redo our bathrooms, so what a great inspiration your post is for me!
ReplyDeleteThis turned out just great. I would NEVER have known the floor was vinyl!
ReplyDeleteWhat a fantastic job! Love how this turned out. Kudos to you!
ReplyDeleteThat turned out great, I love the tiles you chose and the floor looks great!
ReplyDelete