Halloween Finishing Touches
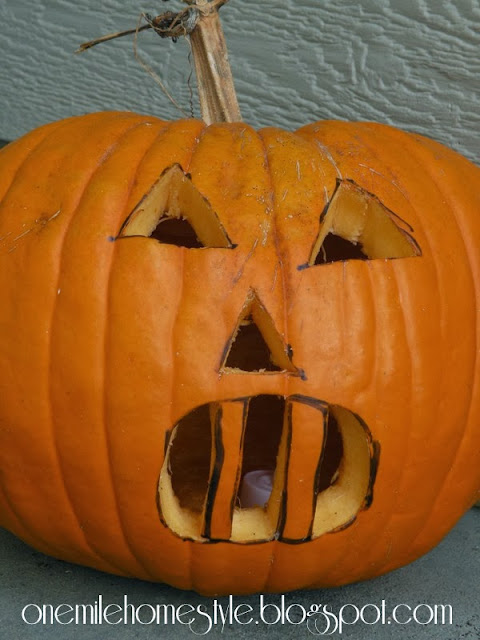
The boys have been begging to carve their pumpkins for a couple of weeks now, and I kept telling them we have to wait until closer to Halloween. That time finally arrived this weekend and they were excited to finally make their jack-o-lanterns. I had each of them draw on paper what they wanted their pumpkins to look like and then I drew on the pumpkins.
This year they were not at all interested in cleaning out all the seeds and gunk, any guesses on who got the honors on that task?! They just wanted to go straight to carving with those little knives that come in the carving kits. I assisted as needed with the carving, but they did a majority of it on their own.
We have a vampire jack-o-lantern designed by the 7 year old, and a Darth Vader inspired jack-o-lantern designed by the 5 year old.
My parents picked the last of the decorative gourds they planted and I brought home another grocery sack that was about to explode it was so full. (I don't think I even took close to half of what they had picked!) Since we finally had a couple of morning freezes, I got rid of almost all of my potted plants and moved our pumpkins and gourds up by the front door. The spooky wreath and 2 newly carved pumpkins finish up our outdoor decorating.
And in honor of doing things at the last minute, the kids Halloween parties are this week, and I wanted to take a little treat for the kiddos in each of their classes. I was having a hard time brainstorming ideas, knowing that I was not going to have a ton of time make something. So, I went old-school I made something that I remembered from my school days; tootsie pop ghosts!
Super simple, although in my head I was thinking "Oh, this will be a quick little 15 minute project." Yeah it took a little longer than that, but still was relatively quick.
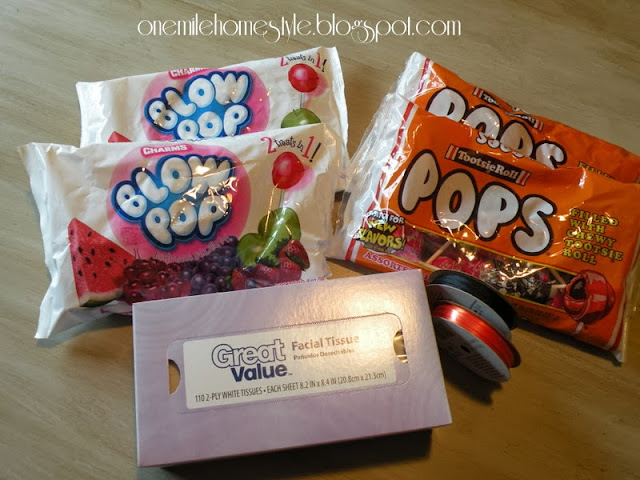
Here is what you need:
*Tootsie Pops and or Blow Pops
*Box of cheap kleenex
*Orange & Black Ribbon
*Black marker
Directions:
Cut your ribbon into lengths that are 4-5 inches long. Center the tootsie pop in the kleenex, wrap the ribbon around it and knot it, draw a couple of eyes on your ghost, and repeat!
Happy Halloween to you all! Check back on Friday for costume pics and the October wrap-up, see you then!


Comments
Post a Comment
Hey there!! Let's chat!